Installation Instructions
Treads Plus come in two sizes, 1 ⅛ inch and 1 ½ inch nosing. This guide shows the installation of the 1 ⅛ inch nosing piece, but is directly applicable to 1 ½ inch nosing as well. You can familiarize yourself with the general installation result and terms by examining the picture below. 
This picture depicts a side view of a stair tread and riser. The Luxury Vinyl Tread (LVT) nose piece is installed and glued into place, and joined with a piece of standard stair planking that has been cut to cover the remainder of the tread. A riser cover can then be affixed to finish the step.
- Measure the stair tread width.
-
Transfer the measured length of the stair tread to the Luxury Vinyl Tread (LVT) nose. Best practice is to cut the tread so that the blade of the saw passes from top to bottom, this will prevent edges from fraying.
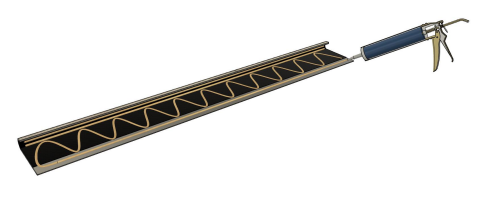
- Sand the foam backer side of the LVT nose with a low grit sand paper until it becomes rough and porous, this will allow the construction adhesive to better bond with the foam backer. Be sure to have sanded anywhere the construction adhesive will be applied. Apply construction adhesive at the tip of the nose, and the upper nose as shown. The adhesive should be in long beads that stop ½ inch short of the edges so it doesn’t push out when applied to the stair. The adhesive can be applied directly to the stairs as well.
- Apply construction adhesive to the rest of the step being sure to uniformly cover the surface.
- Place the LVT nose on to the stair nose and firmly press into place. Make sure riser cover is in place and adhered to the previous riser if applicable.
-
Mark the width of the measured stair tread to the flooring plank so that both ends of the plank will be cut off. 7. Measure from the back of the LVT tread to the stair riser
- Measure from the back of the LVT tread to the stair riser
- Transfer the measurement to a standard piece of matching flooring and cut off the excess. Be sure to cut off the groove side and leave the tongue side of the plank.


- Apply construction adhesive evenly over the surface of the back of the flooring plank. Be sure to have sanded anywhere the construction adhesive will be applied.
- Firmly Lock the LVT nose piece and the flooring plank together and press them into the step.
- Adhere the riser cover to the riser to finish the step. Repeat process for remainder of steps.


Tips and best practice
- When integrating your top step into the rest of the areas flooring it is suggested that you start your flooring at the top step and work out form there.
- Weights or clamps may be utilized to keep steps in position while the construction adhesive cures. Follow construction adhesive instructions for curing times.
- Starting on the bottom step and working up is the best way to install Treads Plus in most cases.
Suggested Construction Adhesives:
Acrylic, Solvent-free, Water based, adhesive is suggested when adhering to polyethylene foam backing.
- Roberts 7350 Universal Adhesive
- Roberts 1407 Rapid Repair Adhesive
- Roberts 2350 Hard-Set Adhesive